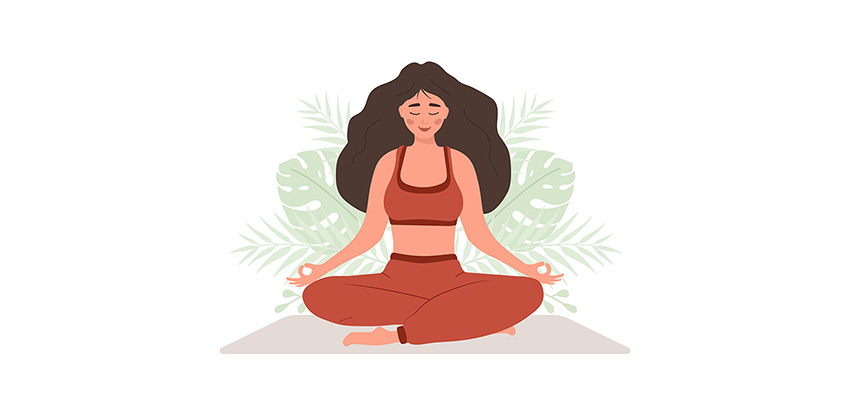
It’s hard to ignore the benefits of yoga today, and with more and more people talking about how a few minutes of simple asanas have changed things for them, one can't help but try to see if it works on their health. What we have for you today is one of the simplest exercises that are often a favourite of yoga beginners, the padmasana.
This is the one exercise most of us Indians have been trained to do right from our days in school, squatting down on the floor in a line one behind the other as we heard the principal make a speech or the PT teacher shouting instructions to the whole school.
And then, age happened, and with that came the comfy chairs of the corporate world, pampering us to destruction and spoiling us with all the wrong postures.
So, let’s get back to the discipline we learned at school: squatting down for at least a few minutes a day to perform what we know as the padmasana, one of the best yoga asanas for beginners.
If you are one of them, come along, and we’ll give you all the tips and tricks you need to master the art and do it right till you reap the many benefits of yoga poses like this.
Why Should I Do A Padmasana
Now, this is for all those of you who are reading this right now and frowning. Yes, we know you already have a busy schedule without having to squeeze in those extra fifteen minutes a day to squat on a mat like you have nothing better to do.
So, for all of you who are reading this right now and nodding, here’s how the padmasana pose can benefit you.
Posture
Have you ever received negative feedback on your posture? Well, then try a padmasana, and this will never be a problem for you.
What’s more, the asana also goes a long way in giving you a better physique and in other words, a better appearance. Now, you liked the sound of that, didn’t you?
Respiration, Circulation, Digestion
If only you knew what a few minutes of deep breathing can do to you. And what better pose to help you out with this than the mighty padmasana?
In other words, sitting in this pose increases the capacity of your lungs so you can take in more air and in turn, improve your blood flow, thus saying goodbye to all respiratory and cardiovascular diseases.
And hey, there’s more. The pose is known to improve one’s digestion, too, serving as a great massage to the area around your abdomen to get rid of constipation and other such issues.
Mental Health
Finally, padmasana is greatly known to help in mental health. Why spend a bomb on doctors and shrinks when all you have to do is sit in this pose for a few minutes a day to improve your mental health?
Anxiety, fear, worry, and tension are all some things you can reduce to improve your mental health.
This is a pose that helps you relax as you breathe regularly till you achieve a state of peace.
Easy Childbirth
Much as we love kids, most women silently get scared at the word childbirth, putting a tough face to the world while dreading the date that is coming closer.
So, why not practice a few minutes of padmasana a day? You’ll be surprised to see how greatly this can benefit you.
First, Know the Types Of Padmasana
The two types that you have here are ardha padmasana and baddha padmasana.
Now, let’s look at each of these in brief.
Ardha Padmasana
The term ardha, as most of you Indians would know, means half, and so here, you get to perform half the padmasana.
And how do you do that? Just like you did in school. You place your left foot on your right thigh or vice versa. So, where does your other foot go?
It’s probably already in place by now, comfortably tucked beneath your other thigh.
And that is what you call the ardha padmasana.
Stay like this for a while. If you are a beginner (which is probably what you are), it will suffice to remain in this pose for a matter of a minute or two.
You can increase the time as you go till one day, you can sit for a whole five minutes and give yourself the pat you deserve.
Yes, don’t forget to compliment yourself in the process, too.
Baddha Padmasana
Now this is the pose that, when achieved, can make you look like a complete lotus, and that is why we call this the Baddha padmasana.
Now, here, you don’t tuck your feet beneath your thigh. Here, both your feet go on your thighs. That means your left foot goes on your right thigh, and your right foot is on your left thigh.
But hey, stop. You may not be able to master this at first, so if you find yourself struggling, don’t go ahead and break any bones.
Give yourself some time, mastering the ardha padmasana first and then stretching a bit each day till you one day find yourself smiling when you finally get the baddha padmasana, too.
Practice makes perfect, you know?
How Do We Do It?
We know you are impatient to learn, and reading the above has wiped the smile from some faces, and here’s hoping to help you with the steps.
Read on.
Step One - Getting Set
We hope you've already done that and are all ready on the floor with a yoga mat.
And oh wait, if you didn’t know already, here’s another very important tip.
Always perform your yoga exercises on the yoga mat, and do not use this mat for any other activity.
If you don’t have one right now, let it be. But make sure that you get one soon.
You can choose your favourite colour.
Ok, now, before we go ahead, stretch your legs.
Step 2 - The Pose
It’s easy actually, but for those who have never done it, here it is. Bend your right knee (or whichever you find easy) and place it over your left thigh.
That was simple, wasn't it? Beginners might go through a bit of difficulty.
In such a case, remember to do only as much as you can, pushing a little each day till you finally surprise yourself and get the hang of it.
And for those of you who have already got it, make sure that you are doing it right. There are two things you need to know here.
Your sole should face upwards. Your heel should be as close as possible to your abdomen If you are sitting like this, you are doing it right.
Step 3 - Repeat
Now, do the same thing, but with the opposite feet. Let your right foot rest beneath your leg while your left leg does a bit of serious stretching.
Or if it is the baddha padmasana that you are performing, then your right foot goes over your left thigh, and vice versa.
Step 4 - Do It Right.
And amidst all this, make sure that your spine is firm and erect. You can lean against the wall if you want to. This could make it easier for you.
Hold your head straight, looking ahead. This makes it possible to take long and deep breaths.
You need to pay attention to your hands, too. So, place them on your knees with your fingers arranged to form a mudra. Tips of thumb and forefinger come together, just like when you say, ‘super’, but this time, your palm faces upwards.
Making It Easy
So, here are a few tips for those who found it hard. Make sure that you follow these on a daily basis, and do not cheat if you want to master them.
Be Disciplined
You will get there only as long as you stay focussed, so set a time to exercise each day, preferably in the morning.
Don’t shy away from waking up a little early. Wiser people learn faster, you know?
You are not going to get there when you practice after long gaps, and try out the padmasana only when the mood calls for it.
Go Easy
Being disciplined doesn’t mean being too hard on yourself unless you are ok with a few torn tissues and broken bones.
Don’t be in a hurry to get there in a single day. Rather, you can put in a little effort each day.
Breathe
Breathe long and deep. This helps you stay focused and, more importantly, calm as you try to master the pose.
A Few More Precautions
We can’t be too careful when it comes to teaching you the asanas, for in the end, we don’t want you complaining about what we taught you to do. And so, to protect yourself from any injuries, read on for a few more tips.
Stretch and Prepare
It’s called warming up, what you do before any exercise. Yoga needs a good amount of stretching to begin. So, if you are a beginner (and even if you’re not), never be too excited to jump ahead. A good exercise session begins with a good warm-up and ends with some cooling down; yoga is no exception. And yes, in case you didn’t know, no one eats before exercising, so if you are reading this after having feasted on a hot plate of biryani, it doesn’t matter how excited you are. It’s time to postpone your activity.
Holidays
Do not try to do the asana on a day when you are sick, especially with stomach, knee, or back pain. This could make things worse, so don’t come crying to us if you did. If you’ve recently been through an injury, give yourself a break till you are up and about again. Don’t try breaking a few more bones. It is not a sin to give yourself a few holidays.
Stay Away
If you are suffering from sciatica, this is not for you, so don’t go out and try to get
adventurous. Be faithful to the advice of your doctor and the advice that we are putting forth here before you unless you are ok with things getting even worse for you.
Conclusion
There, you are excited, aren’t you? But before you go, let’s end with something Important. Remember that knowledge is always good when it’s shared, so let this lesson not end with you. Rather, pass it on to someone you think could also put it to good use. In the end, we don’t want to be the only ones on Earth living healthy. You want your loved ones to be healthy, too, don't you?


 FOR EXISTING POLICY
 FOR NEW POLICY